Dampness is one of the most common yet damaging problems faced by residential, commercial, and industrial buildings. From peeling paint and dark patches on walls to persistent musty odours and fungal growth, dampness not only ruins the appearance of a property but also weakens its structural integrity and negatively impacts indoor air quality.

Many homeowners try to solve damp problems by repainting walls, only to see the stains return within a few months. The reason? Regular paints are not designed to resist moisture. This is where damp proof paint plays a crucial role. However, simply buying a damp proof coating is not enough. Correct application is the key to achieving long-lasting results.
In this detailed guide, we will explain how to apply damp proof paint properly, covering everything from understanding dampness, surface preparation, application methods, drying time, common mistakes, and maintenance tips. If applied correctly, damp proof paint can significantly increase the life of your walls and protect your property for years.
What Is Damp Proof Paint?
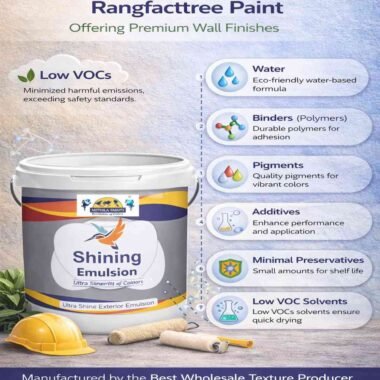
Damp proof paint is a specially formulated coating designed to block moisture penetration and prevent water seepage through walls. Unlike standard interior or exterior paints, damp proof paints contain waterproofing agents that create a protective barrier on the surface.
These paints are commonly used in:
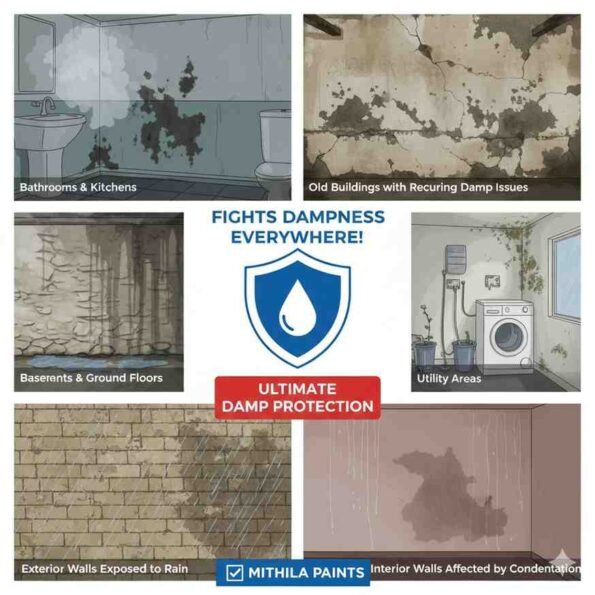
- Interior walls affected by condensation
- Exterior walls exposed to rain
- Basements and ground-floor walls
- Bathrooms, kitchens, and utility areas
- Old buildings with recurring damp issues
When applied correctly, damp proof paint helps:
- Prevent water seepage
- Reduce fungal and algal growth
- Improve paint adhesion
- Protect plaster and masonry
- Enhance durability of the final finish
Understanding the Types of Dampness Before Painting
Before applying damp proof paint, it is important to identify the type of dampness, as this determines how effective the paint will be.
1. Penetrating Damp
This occurs when rainwater enters through cracks, porous bricks, damaged plaster, or faulty external surfaces. Damp proof paint works very effectively in such cases, provided the surface is properly prepared and sealed.
2. Condensation Damp
Caused by warm, moist air coming into contact with cold wall surfaces, especially in kitchens, bathrooms, and poorly ventilated rooms. Damp proof paints with anti-fungal properties help control moisture and prevent mould growth.
3. Rising Damp
This happens when groundwater travels upward through walls due to capillary action. Damp proof paint can reduce visible damage but should be combined with a proper damp proof course (DPC) for a permanent solution.
Correct diagnosis ensures realistic expectations and better results.
Why Proper Application of Damp Proof Paint Is Important
Many damp proof paint failures occur due to poor application practices. Common reasons include painting over damp surfaces, skipping surface cleaning, or ignoring drying times. Proper application ensures:
- Strong adhesion between wall and coating
- Uniform coverage without patchiness
- Maximum moisture resistance
- Long-lasting performance
A well-applied damp proof coating can extend wall life by several years.
Tools and Materials Required
Before starting, gather the following tools and materials:
- Damp proof paint
- Wire brush
- Paint scraper
- Sandpaper (180-grit recommended)
- Wall putty (for interior repairs)
- Clean water
- Paint brush, roller, or spray equipment
- Protective gloves and mask
Having everything ready avoids interruptions during application.
Step 1: Surface Inspection and Preparation
Surface preparation is the most critical step in applying damp proof paint. Even the best product will fail if applied on a poorly prepared surface.
Cleaning the Surface
- Remove all loose paint, dust, grease, and dirt.
- Scrape off flaking or blistered paint.
- Use a wire brush to remove algae, fungus, moss, or mould.
- Wash the surface thoroughly with clean water.
- Allow the surface to dry completely.
👉 Painting over dirt or fungal growth traps moisture and leads to peeling and failure.
Step 2: Repairing Cracks and Surface Defects
For interior walls:
- Fill cracks, holes, and dents using thin coats of wall putty.
- Allow each coat to dry properly.
- Sand the surface with 180-grit sandpaper until smooth.
- Wipe off sanding dust using a dry cloth.
For exterior walls:
- Seal visible cracks and joints.
- Ensure plaster is sound and well bonded.
A smooth and uniform surface ensures better adhesion and even coverage.
Step 3: Ensuring the Surface Is Dry
Damp proof paint should never be applied on wet or damp walls.
- Allow washed surfaces to dry for at least 24 hours.
- Ensure there is no visible moisture or damp patches.
- Painting on a dry surface allows the coating to form an effective moisture barrier.
Step 4: Mixing and Preparing the Damp Proof Paint
Before application:
- Stir the paint thoroughly to achieve uniform consistency.
- Follow manufacturer recommendations for dilution.
- Typically, damp proof paint can be thinned using 300–500 ml of clean, soft water per litre, depending on surface condition.
- Avoid over-dilution, as it reduces waterproofing performance.
Proper mixing ensures consistent protection across the surface.
Step 5: Choosing the Right Application Method
Damp proof paint can be applied using different methods depending on surface size and finish requirements.
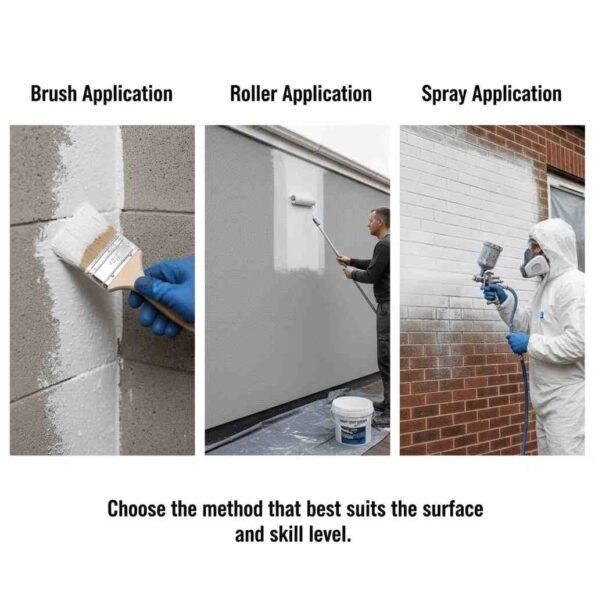
Brush Application
- Ideal for corners, edges, and small areas.
- Provides better control in detailed sections.
Roller Application
- Best for large interior and exterior wall surfaces.
- Ensures uniform thickness and smooth finish.
- Medium-nap rollers work well on masonry surfaces.
Spray Application
- Suitable for large exterior areas.
- Offers fast and even application.
- Requires professional handling to avoid overspray.
Choose the method that best suits the surface and skill level.
Step 6: Applying the First Coat
- Apply the first coat evenly without overloading the surface.
- Maintain consistent pressure for uniform thickness.
- Do not attempt to cover everything in one thick coat.
The first coat acts as a base layer and prepares the wall for enhanced moisture resistance.
Step 7: Drying Time Between Coats
- Allow the first coat to dry for 6–12 hours, depending on temperature and humidity.
- Proper drying ensures good bonding of subsequent coats.
- Avoid exposure to water or moisture during drying.
Rushing this step can compromise the entire system.
Step 8: Applying the Second Coat
- Apply the second coat in the same manner as the first.
- Ensure complete and uniform coverage.
- This coat enhances waterproofing and durability.
In areas with severe dampness, an additional coat may be recommended.
Step 9: Final Drying and Curing
- Surface dry time: 1–2 hours
- Complete curing: 24–48 hours
- Protect the surface from water during curing.
Once cured, the surface is ready for finishing coats if required.
Common Mistakes to Avoid While Applying Damp Proof Paint
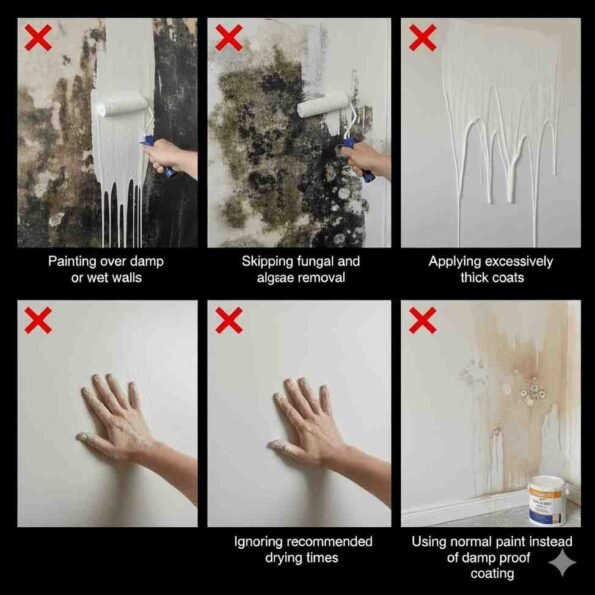
❌ Painting over damp or wet walls
❌ Skipping fungal and algae removal
❌ Applying excessively thick coats
❌ Ignoring recommended drying times
❌ Using normal paint instead of damp proof coating
Avoiding these mistakes ensures maximum effectiveness.
Maintenance Tips for Long-Lasting Damp Protection
- Clean walls periodically, especially in humid areas.
- Remove early signs of fungal or algal growth every six months.
- Repair cracks immediately to prevent water ingress.
- Ensure proper ventilation in kitchens and bathrooms.
Regular maintenance significantly increases the lifespan of damp proof paint.
Can You Apply Normal Paint Over Damp Proof Paint?
Yes, once the damp proof coating has fully cured, you can apply regular interior or exterior paint over it. Ensure:
- The damp proof layer is completely dry
- Compatible topcoat is used
- Proper adhesion is maintained
This allows you to achieve both protection and aesthetics.
Final Thoughts
Damp proof paint is a powerful solution for moisture-related problems—but only when applied correctly. From surface preparation and proper application to drying time and regular maintenance, each step plays a vital role in ensuring long-term protection.
By following this detailed step-by-step guide, you can:
- Prevent recurring damp patches
- Improve wall durability
- Enhance indoor air quality
- Protect your property investment
Whether you are a homeowner or a professional contractor, correct application transforms damp proof paint from a temporary fix into a reliable, long-lasting solution.